Posts

Showing posts from June, 2015

Manfrotto MVM500A Monopod

Image
Manfrotto MVM 500 A Monopod In one of the weddings I've shot, the main videographer lent me his monopod.   I can’t remember what model of monopod it was but I’m sure it’s Manfrotto.  I used his tripod for the whole wedding event and it’s amazing! My revelation in all of this is, this monopod stands with my Sony A7s + LED light on top. Monopod vs Tripod I always side with tripods.  I’m in the belief that tripods can mimic what monopods can do. I believe that you only need to extend all the legs once, yet bunch all the legs together to form a monopod, well this isn’t true.  I believe that it’s just as fast to adjust the legs of the tripod compare to a monopod, well this isn’t true.  I believe that a tripod (with legs bunched up together) can work just like a monopod, well this isn’t true.   I believe that monopods can’t stand on its own.  This is not entirely true. Monopods are very unique equipment for specific purposes that they are the only ...
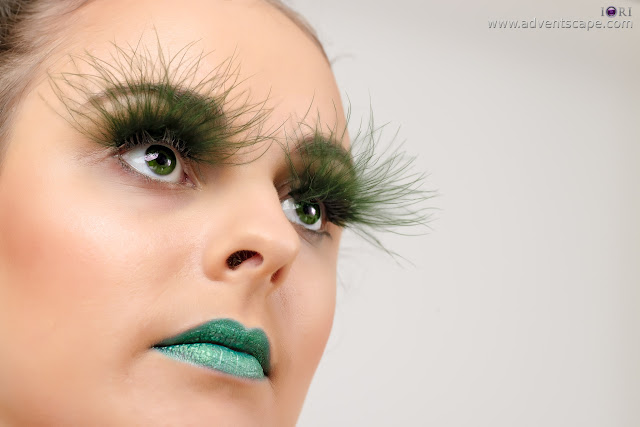
Change Eye Colour

Image
Change Eye Colour Change Eye Colour (Original) I did a creative beauty shoot 2 weeks ago and it involves changing the eye colour.  I do admit, although we need to do as much on the set as possible, ‘changing eye colour’ would be easier doing it on post.  This is photography, so it only involves still photos (not video!).  There are many tutorials on the internet (and in Youtube where you can just sit down and watch), but some are not as effective and some are lengthy process. I want to change eye colour in the shortest possible time with very effective results. How to Change Eye Colour, The Layers My steps are very simple, quick and effective.  Just follow the steps below:   Create a new layer - I always create a new layer when starting a new edit.  Sometimes I rename this layer to point out where the edit starts. In the new layer, mask the eyes (‘Masked’ layer).  As long as you’re only affecting the eyes, then it’s a good start.  There are many w...

Vivid Sydney 2015

Image
Vivid Sydney 2015, Town Hall Vivid Sydney is held every year in Sydney.  In 2015, another set of lights, locations and activities were created for those willing participants.  I'm a willing participant.  But I'm only interested with their light ideas. There are many ways to capture Vivid Sydney.  But the most beautiful way to showcase this event, in my opinion, is through timelapse.  Thus I wanted to do timelapse.  I have a Nikon D800e.  It also has a time-lapse menu so I was thinking of taking advantage of it.   I plan to grab both time-lapse and movie.  I need to take photos as well for this blog.  Since I'm only doing snippets, I don't need to take time-lapse for hours.  All my timelapse were under 10 minutes each. The Locations I went to many major locations of Vivid Sydney.  The following are places I visited: Sydney Opera House Circular Quay The Rocks Kirribilli Darling Harbour The Star Martin Place Town Hall I haven't se...

Alexa Photo Shoot

Image
Celine Alexa Lopez Although I’m geared towards video, photography will never disappear from me.  Last Monday (08 June 2015), I did a photo shoot with Alexa.  She’s a cute, lively girl with a beautiful smile.  I did enjoy this photo shoot.  It’s light, easy and painless (except when I’m sitting very low on the ground).  Location The location of the photo shoot was at Lighthouse Reserve – a park beside Maquarie Lighthouse (Old South Head Road).  This is a beautiful park with cool breeze and a view of the ocean.  Maquarie Lighthouse is very accessible.  Below is the map. Just search for Macquarie Lighthouse (Old South head Road at Vaucluse). Since Isy’s house is near this area, I think we’re going to frequently do our photo shoots here.  I hope it’s not windy though. Make Up Artist To step up this photo shoot, we need a make-up artist (MUA).  This is where Isy came in.  She’s my MUA and does an amazing job.  She does it perfectly ...