Posts

Showing posts with the label Photoshop

Change Eye Colour

Image
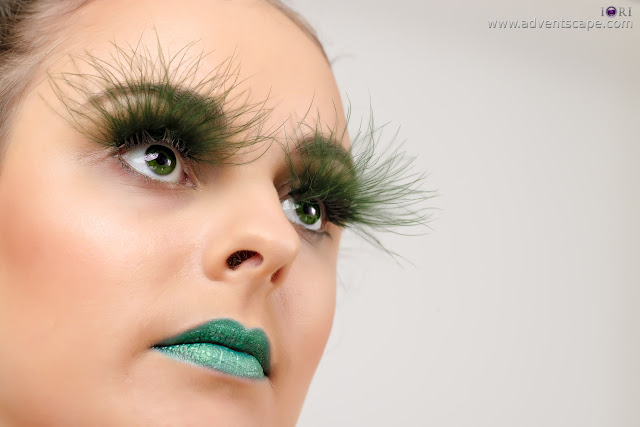
Change Eye Colour Change Eye Colour (Original) I did a creative beauty shoot 2 weeks ago and it involves changing the eye colour.  I do admit, although we need to do as much on the set as possible, ‘changing eye colour’ would be easier doing it on post.  This is photography, so it only involves still photos (not video!).  There are many tutorials on the internet (and in Youtube where you can just sit down and watch), but some are not as effective and some are lengthy process. I want to change eye colour in the shortest possible time with very effective results. How to Change Eye Colour, The Layers My steps are very simple, quick and effective.  Just follow the steps below:   Create a new layer - I always create a new layer when starting a new edit.  Sometimes I rename this layer to point out where the edit starts. In the new layer, mask the eyes (‘Masked’ layer).  As long as you’re only affecting the eyes, then it’s a good start.  There are many w...

DNG-JPG-TIFF-PSD

Image
Surge of Silence Digital photos have been created, modified, transformed, copied and archived in so many file formats.  Each file format has a definite advantage compared to others and it's hard to choose which ones to use.  This is neither the RAW vs DNG and RAW vs JPG debate.  This is just a simple guidance on the file formats and it's brief advantage over the other. I will outline what file formats I use so this can give you some ideas.   In my workflow, I use 4 file formats, namely: DNG  JPG TIFF PSD All four (4) formats are completely different from each other.  Each serves me a purpose.  I could not favour one to let go of the others.   Golden Decree DNG (Digital Negative) My files are initially NEF, a proprietary image format from Nikon.  But if I import all these to Lightroom, I convert them to DNG.  Thus, DNG plays a big part of my workflow as it's where I view, manipulate, render, export my photos.   Back in the ...

The Photog Gamer

Image
Logitech G700 Mouse I play games.  I have several games I play whenever I get bored with Photography.  I love Role Playing Games (RPG) and First Person Shooting (FPS).  I have the following in my closet: Diablo 2 / 3 Battlefield 2 / 3 Medal of Honour Dragon Age 1 / 2 Some of these games are old, but I just love playing them.  I buy whenever a sequel goes out of the market.  Since they are established games, they must be good.  It's the same reason why I buy a powerful PC.  It should handle my photo library (Lightroom), post processing (Photoshop) and games smoothly.  I bought 2 items to enhance my gaming: Keyboard (Logitech G19) Mouse (Logitech G700) These peripherals are very good at keeping all the needed buttons together.  They are also very good at adding a bunch of buttons together for easy access and use (rather than hovering your hand from one end of the keyboard to another). Logitech Gaming Software - Button Configuration The Culling ...

Black and White Control

Image
Spanning my Dreams in Black and White There are so many ways to get a black and white photo.  The most popular is converting a colored photo to black and white.  Though you can achieve this right there in the camera.  In the digital age, converting a photo to black and white is just a press of a key or initiate an action.  In my workflow, I can use the following to get black and white photo: In Camera - either force the camera to capture black and white or edit in-camera. Lightroom - it's Develop module has enough to give awesome B/W photos Photoshop - sky's the limit, do everything you want to do I don't use my camera to capture black and white.  I wanted to get as much information of the scene as possible which includes color.  For me, converting is the way to go.  This way, if I want color then I have it, if I want black and white then I'll convert it. Lightroom For quick snaps in black and white, I use Lightroom.  I believe that Ligh...

Non-Destructive Dodge and Burn

Image
Ray of Triangulation - Dodged & Burned Manually Dodge and Burn is a very useful technique in Photoshop (and is frequently used as well) that many digital artist uses.  Basically you lighten (dodge) and darken (burn) parts of your photo according to your liking.  Although the Curves and Levels tools do quite a good job globally, Dodge & Burn polishes it out to finish in specific-hard to reach areas. Many might already know this technique in Photoshop but some might not.  When I'm editing my landscape photos, I use a non-destructive layer that does dodge and burn.  This is a separate layer that can be painted over and over.  To create this when you're in Photoshop: 1. Open an image 2. Hold 'Alt' and Click 'New Layer Icon' (a dialog box opens) 3. Do the following: Name: Give a name to the layer Mode: Overlay Tick: Fill With Overlay-Neutral Color (50% gray) 4. Click 'OK' Non Destructive Dodge & Burn Layer Created a Dodge and Burn Layer This creat...